quoted from ragezone
http://forum.ragezone.com/f497/blender-tut-some-advance-different-techniques-531295/[QUOTE=Distress;4672330]I noticed the two other Blender TuTs don't really go into much detail so I'm going to try to show you a different technique. Only view this thread if your aware with Styx's previous thread/have some experience.
1,
What you'll need:
-.ELU Exporter Script (
http://forum.ragezone.com/f496/elu-b...porter-501172/)
-.ELU Importer Script (
http://forum.ragezone.com/f245/elu-a...porter-488857/)
-Python (Without Python, you can't run Blender.) (
http://forum.ragezone.com/f245/elu-a...7/#post4297496)
-Blender (
http://forum.ragezone.com/f245/elu-a...7/#post4297496)
-A GunZ Client you can edit. (Like TrinityGunZ;
http://trinityent.tk/)
-Stock picture, for this tut you will need a sword with a somewhat normal handle/blade.
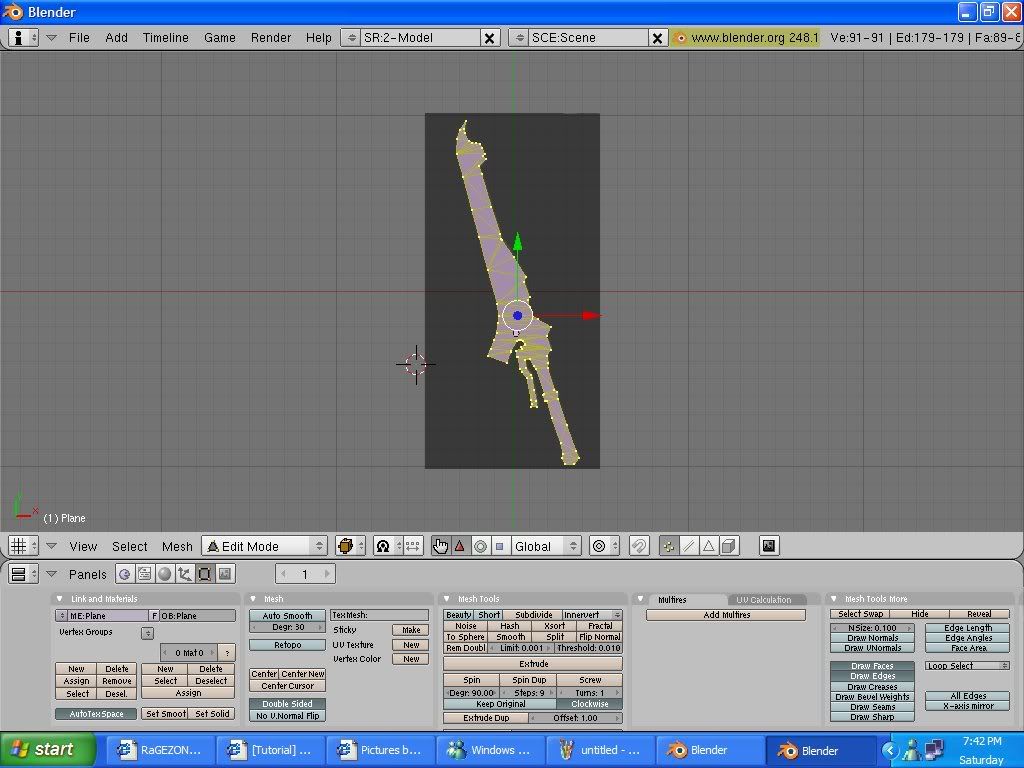
2, Load your stock image the sword,(View, Background image, and load). You will proceed as normal and (Add, mesh, plane, edit mode, place the plane on the edge of your weapon, delete 2 vertices and trace around). Now select your vertices (A) and fill your sword (shift +F), it should look something like this:
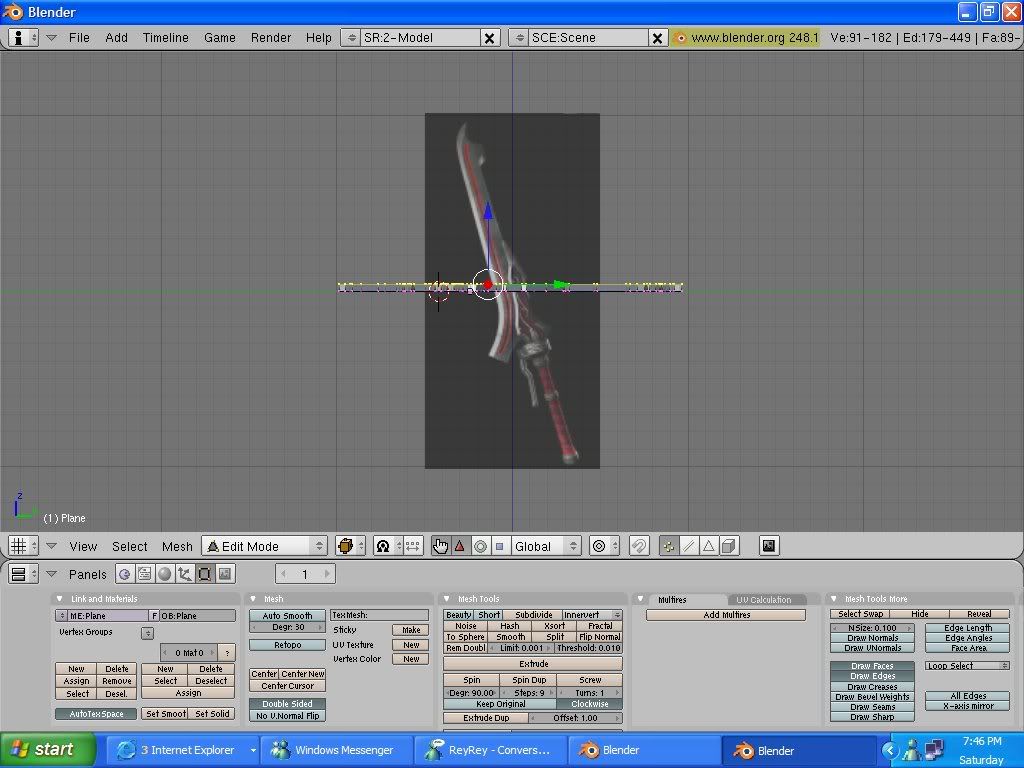
Now,press numpad 3, and notice your at the thickness part, now listen closely.
-Press E>Region then stretch it to HALF of what you want the thickness to be, like this:
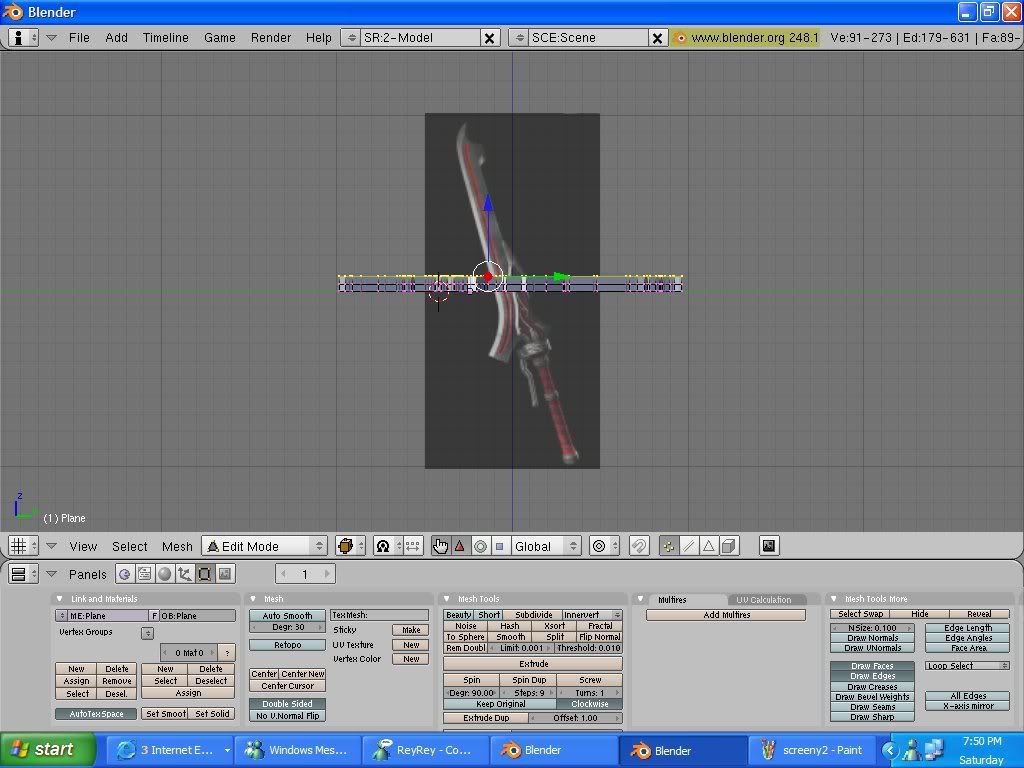
Now you will notice the top line is still highlighted yellow, press E then region again, now this time your doing the other half of the thickness:
3, Now you all know how to do this part, we're texturing (but don't think we're done) press numpad 7, then split the window, click the little grid and go to UV/image editor and load in your image. Hover your mouse over the left side (with your filled in sword) and press U>Project from view and your sword will be overtop of the left side now. Scale your sword (S) and move it (G) so its on top of the texture , exactly the same.
(If your having trouble following refer back to Styx thread, I only get 10 screenys and need them).
-Now once its overtop of the texture, switch to object mode then the button to the right click Textured.
4, Now that its textured press 7 and get to a good view where you can see the side of your sword, like:
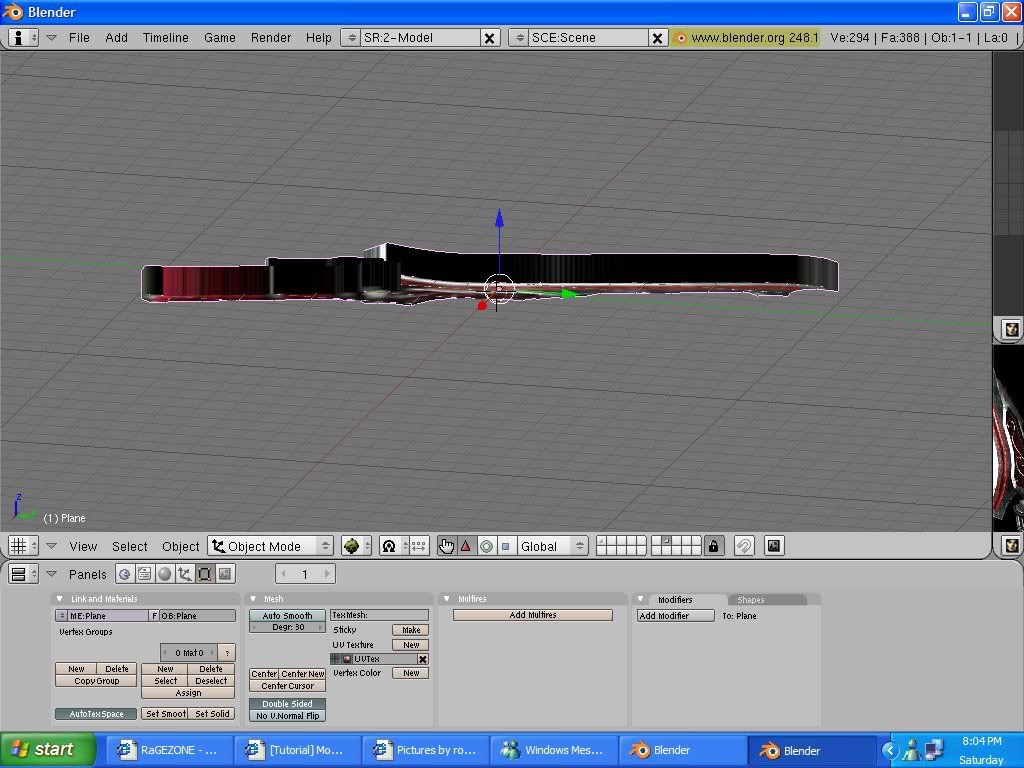
-Now that your in view switch back to edit mode, and to the right switch from Textured to "Solid", press A to deselect all vertices. Looks confusing now , huh?
-The main focus of this part is to select (Shift+right click) all the MIDDLE vertices of the blade (not the handle):
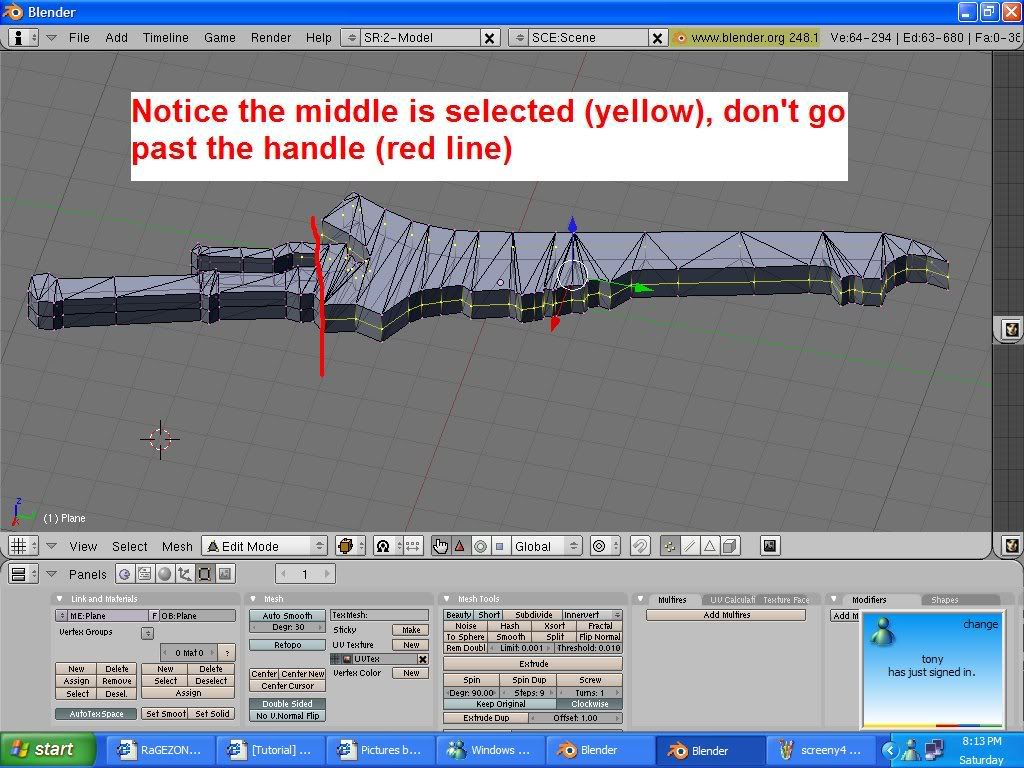
-Once they're all selected press numpad 7 and then press S to scale the middle part a little wider than the actual sword, notice the sharp effect taking place.
(note: Some swords look good with this technique, some don't, this may be one of them >.<)

5, SUBSURFING:
-Now go back to OBJECT mode, we are going to apply some modifers. (If you wanted a different level modifer on the handle from blade you would have to split them into two seperate parts than merge later, but for simplicity we're doing both the same level).
-Once in object mode all go down to your panel , click Modifer and select Subsurf.
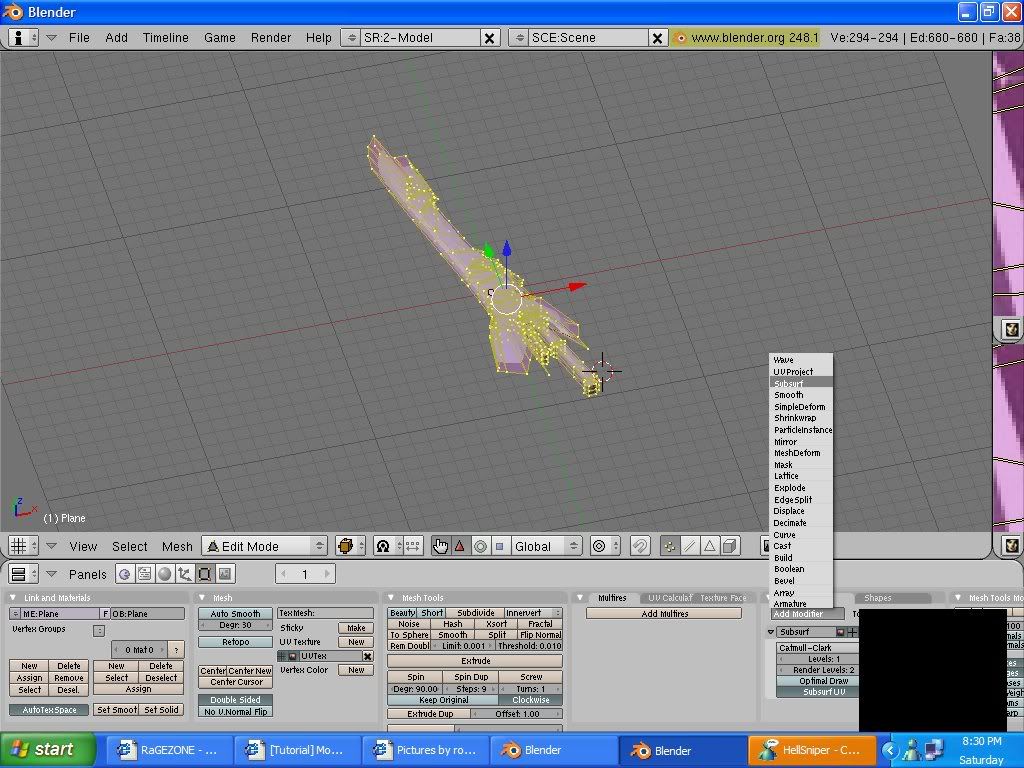
-Subsurf is to add smoothness, essentially it makes blocky objects rounder. DONT NO GO OVER LVL 6 MODIFER, IT LAGGS LIKE F*CK. I stick with 3

6, Final Texture:
So now it comes time for the final texture, hit F5, then click "New link" or Link , then press f5 again. You will see texture, hit add new, then texture type> IMAGE and load the orignal picture you used for texture.
Switch back from Solid mode to Textured to apply, and voila!
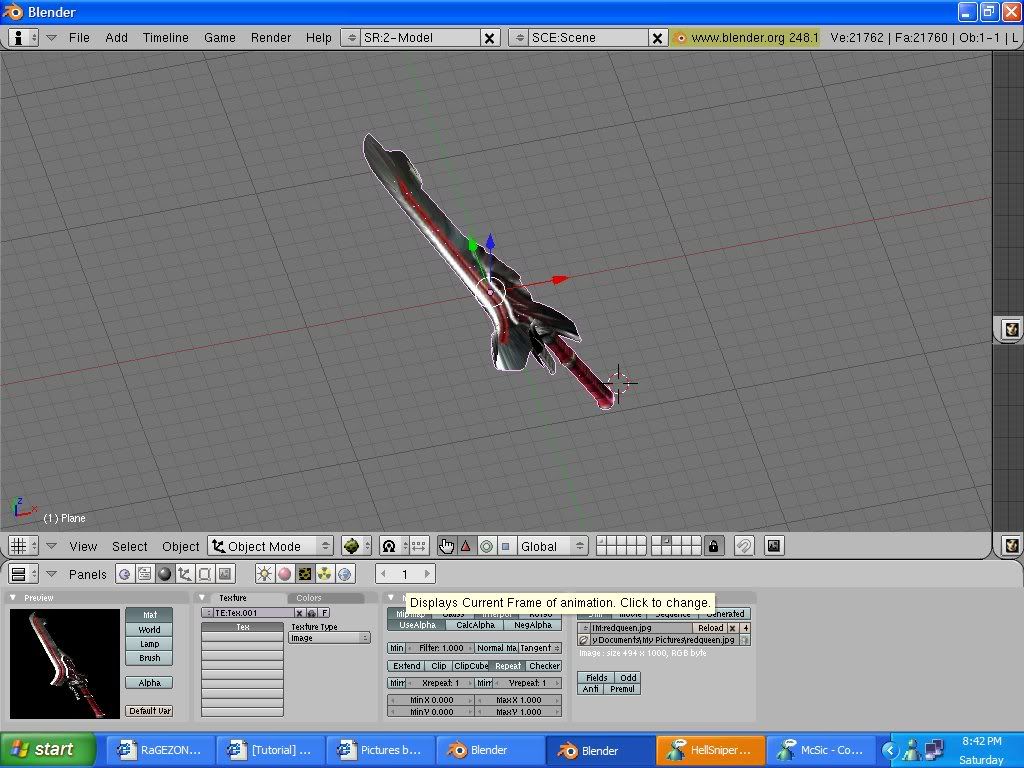
I wont be teaching you how to allign the handle with the lines (Creating where the player holds it) because I have not the time and you should already know ;D once your done that , file>Export, Gunz.elu
If you ever notice a blank spot in your weapon when testing, just go to blender and select faces that are wrong and press control N to recalc faces.
Credits to Crayziegoy and Hellsniper for teaching me about Blender,
Credits to Crayziegoy for teaching me this technique.
Hope you enjoyed /learned something.
-Distress/Rawr[/QUOTE]